Archive | Mama Made RSS feed for this section

A gift idea: For the woman who has everything

2 Jul

Has this ever happened to any of you? Finding a gift for a person who has everything.  Recently, my mom celebrated her birthday.  Actually it was 3 days after mine.  I always tell her I am her forever birthday gift.  Now you know that’s about cute for a few years, then mom wants you to pony up and get her a real gift.

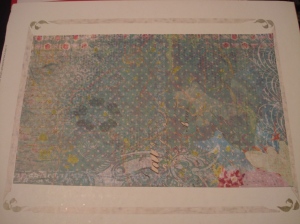
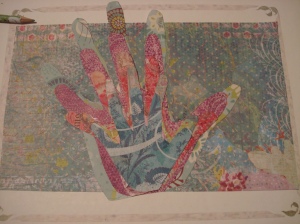
This year I was at a lost.  I could do the “old” reliable, a gift card.  However, I did that last year.  So when it doubt ask someone who does not know your mommy.  I was talking to my friend Denise and she suggested an idea she saw on Pinterest.  Eureka! Why didn’t I think of that.  My friend suggested I do a hand print craft featured on TresFrenchhens. Here is a picture.
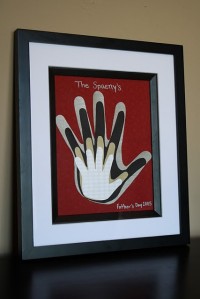
 It is a really cool idea. So I set out to make it happen for my mom.  My first task, find an affordable frame big enough for our little family project for mom.  I went to Goodwill.  This actually was my first time in this thrift store haven.  I racked up not only a good-sized picture frame, a chair for my girls room(my next revamp project), a plate, tambourine for less than $20. Score!

The first thing, I traced all of my families hand prints on coordinating colors of scrapbook paper.  I actually had some on hand(no pun intended).

The frame I purchased for $2.75 actually had a picture inside mounted on heavy cardboard. I did not want to move it because of its durability, instead I used scrapbook paper left over from our hand print and covered part of the picture.

Next, I used Mod Podge to glue down each hand print starting with the biggest down to the smallest. I can tell you it was not easy tracing the hand print of a 2-year-old. We had to do it at least three times. I opted not to put our name but instead my favorite Bible scripture, Proverbs 31:28, “Her children arise up, and call her blessed…”

It was a super easy project and I like how it turned out. You can see my pictures below.  What do you think? In His Super Grace,

Ro:)
                         

Thank You for Helping Me Grow

18 May

Teacher Appreciation Week was last week at my children’s school and I am late. There is a lot happening here at SuperMOMdel World Headquarters.  Matter of fact, I have not even posted a Freestyle Friday Craft in more than a month.  Do you forgive me?  Thank you , I need lots of grace!

My children have really great teachers.  Next week, is the last day of school.  Last night, I starting my “Growth” project.  Now here is my disclaimer.  I do have a “supplies” list but as the project progressed it took on a life of its own. I made a lot of adjustments mid way but still want to give you options.

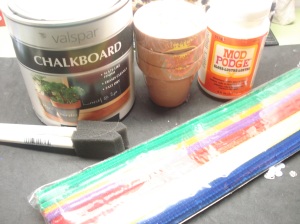
Materials: Chalkboard paint, small flowers pots purchased from The DollarTree, Mod Podge, foam brushes, pipe cleaners, white spoons

Materials: Chalkboard paint, small flowers pots purchased from The DollarTree, Mod Podge, foam brushes, pipe cleaners, white spoons

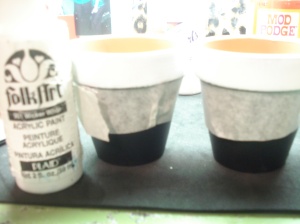
I purchased a set of 3 small flower pots for $1.  I used chalkboard paint I picked up from Lowe’s.  It took about two coats, less than 20 minutes to dry. Around the rim of the flower paint I used white acrylic paint to cover the areas where the chalkboard paint spilled over.

The after picture of both flower pots painted

My 4 year-old daughter says it looks like a flower and that is all that matters. 🙂

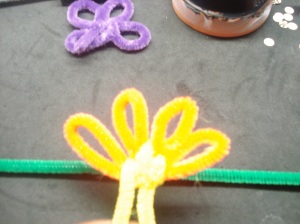
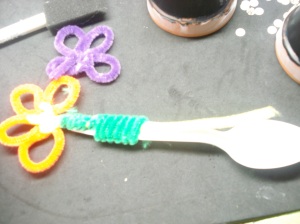
When I started this project I had my own ideas on how to make a flower out of a pipe cleaner. As you can see from the above it came out “ok” but there is a great tutorial online.  Thank God for Google.  You can watch the video here.  I followed the tutorial. It was very easy but I thought the flower would be too busy.

The finished product: Still not sure I am going to use due the size of my flower pot

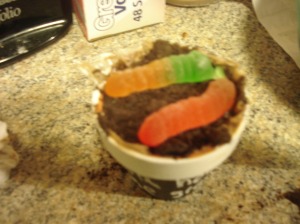
Now that the flower pots are dried it is time to mix up the “Dirt” pudding for the inside. I first heard about “Dirt” pudding when I was working freelance at a Law Firm. We were having a party for one of our colleagues and wanted something fun. One of the women made this pudding in a bucket and served it with a shovel. Super cute presentation, trust me on this one. Mine is the quick and “dirt(y)”, (no pun intended) version. You can see the “real” recipe below. This would also be very cool at a little boys birthday party.

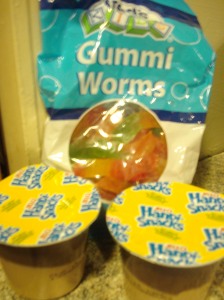
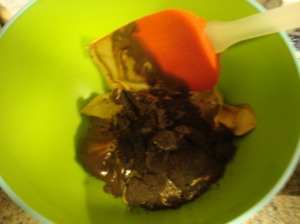
I used store brought pudding but I will mix in chopped up Oreo cookies, everything is better with Oreo cookies, right? And of course you can’t have dirt without worms…gummy worms that is.

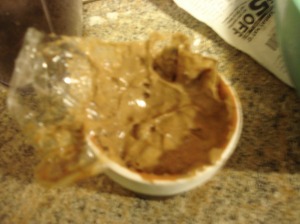
I lined the flower pots with clear wrap, so the teachers can eat right out of it. (Smarty Pants). I filled it with the pudding and cut around the edge to make it look a little cleaner.


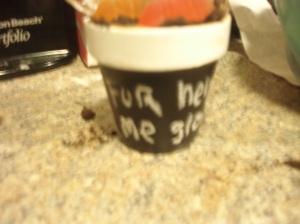
Finally, I covered the top with chopped up Oreo cookies and added two gummy worms. I also work in chalk around the flower-pot: Thank You For Helping Me Grow.

So, what do you think? Is this a good idea?
In His Super Grace
Ro:)
DIRT DESSERT

Lg. flower-pot or sand bucket 2 pkgs. Oreos, crushed 2 pkgs. French vanilla instant pudding with 3 1/2 c. milk 12 oz. Cool Whip, thawed 8 oz. pkg. cream cheese 1 c. powdered sugar 1 tsp. vanilla
You want to make sure the cream cheese and Cool Whip are really soft, makes it easier to mix. Also, note the mixture stays fluffiest if instead of mixing the cream cheese mixture in with the pudding, you fold it in.  And you can use more Oreos than called for.
Mix Cool Whip, powdered sugar, vanilla, softened cream cheese; mix pudding mixture separately and then add to other mixture. Use foil in bottom of clay pot. Layer Oreos, then pudding mixture, ending with Oreos on the top. Plant with artificial flowers and gummy worms. Serve with sand shovel.

A Great Dye Job

11 Apr

My Fashionista friend, Chanel over at Hip Candy gave an old jacket a splash of color. I really like this project for some many reasons, the idea of breathing new life in an item already in your closet, how easy it looks and how budget friendly it is to do. Check out Chanel’s buzz worthy jacket in my favorite color, which is also the HIP color of the season: Yellow.  And no worries, there is a link below withy instructions on how you too can live in color! PS. I am digging through my closet now for an old jacket. 🙂

In His Super Grace

Ro:)

I’ve owned this tan, cotton Old Navy jacket for a few years now, and it’s been a dependable and sturdy companion to wear with jeans, shorts or flowy summer dresses. It wasn’t until recently that I had another light bulb moment in thinking that I could make this jacket more current by adding a splash of bright color, and below are my results! I was quite pleased with them. More pics on my Instagram…  you can follow me if you feel so inclined, and the process I followed to dye my jacket is HERE (I did the washing machine method)
24 Feb

Happy Freestyle Friday: Super Cute idea I found from a fellow Mom blogger. I am attending a baby shower this weekend. I may add this to my gift. enjoy!

Ok. So I know this word has been redundant in my blog but this project really is SIMPLE! Every nursery needs an ABC artwork so why not integrate your baby’s name into it and make it personalized?

It started with a black frame that I got from Ikea’s AS IS section. I had no use for it but b/c it was dirt cheap, I figured I would use it ‘someday.’ Surely enough, I did and it serves its purpose fairly well!

I had to paint the frames stark white b/c nothing in Zoey’s room is black. 

Got these white glitter (subtle) letters from Michaels. They always have 40% off coupons on their website so print them out and utilize them. 

From my scrapbook stock paper collection, I chose a pale pink as the background and a patterned blue as the letters for Zoey’s name.  

A quick glance at the…

View original post 93 more words

Made with Love: The Procrastinator’s Edition

13 Feb

Valentine’s Day is tomorrow as if you did not already know.  If you have children they have probably been reminding you since last Monday.  This weekend I decided to start avoiding and start doing.  So here are a few easy Valentine ideas you can do in an hour or less.  Happy Valentine’s Day! And as a dear friend would say, “I love you, but God loves you so much more!”

In His Super Grace

Ro:)

First, something cute to carry all those Valentine’s home.  I found this at the Dollar Tree.  Yes, for $1, you get the box and stickers.  Of course, we added glitter(everything is better when it SPARKLES!) and added a handle so my girls can carry it like a tote. I found this ribbon wrapped around some wash clothes I purchased at Wal-Mart.  Total cost: $2(includes .99 red glitter)

Next, something pretty to wear on the day of L.O.V.E.  Have I told you how much I love glitter?  I really am a girly girl. Well, I wanted my girls to wear a cute Valentine theme shirt but really wanted it centered around Christ.  So when I could not find it, I made it.

Here is the step by step process.

I pinned my shirt down with paper clips to a cardboard. This is to make sure the shirt is smooth and does not pucker. I used a cookie cutter to trace my heart with a pencil. (I washed it before putting it back in the drawer 🙂 )

I then traced the outline of my heart with Aleen’s Tacky glue, then sprinkle red glitter over the glue.  Tacky glue does not take long to dry, shake off.   I used a ruler to draw a straight line and wrote the word “Loved” with Tacky glue and covered the area in  glitter.  I added the scripture John 3:16 in royal blue glitter under and viola! Now get this, I purchased the kids t-shirts at….wait for it, wait for it… at the Dollar Tree.  My 5 and 4 year-old are super excited to wear these on Valentine’s day!  Total cost: $1 (see below for a version in black)

Second version made with "heart" filled with glitter

I used Mod Podge on the inside of the heart, then added glitter

Finished Design

Finished Design

Now to making those class Valentine’s.  I subscribe to a lot of craft blogs by Moms.  There are so many really cool ideas.  Here is one from Blonde Designs Blog.  When you click on the link you are given a template to make lips and moustache which you attach to lollipops.  I am totally making these for my daughter’s class.  

And Finally, what about the teacher? She deserves some love too, don’t you think?  Valentine’s Day would not be complete without those faithful Conversation hearts.  I grabbed a bag from the Dollar Tree, picked out a few, added about two coats of Just pick of Mod Podge on both sides.  Once dried, take a magnet, which you can find at Michaels, add tacky glue and stick it.  I even took some extra clothes pins, added some red glitter and made those into magnets too!  Super cute!

Happy Valentine’s Day!

Freestyle Friday: Crafting with Purpose

3 Feb
Life’s most persistent and urgent question is, ‘What are you doing for others?” Reverend  Dr. Martin Luther King

Each Friday, I usually post an easy weekend craft project.  This week I am doing something a bit different in hopes that will prompt all my crafty friends to use your gifts to spark creativity while helping women in their next journey of life.  Earlier, this week I shared my love of jewelry making with a dynamic group of women.  The class consisted of 3 women, 1 teenager and a nine year-old girl, all of which whom live in a Transitional women’s shelter about 25 minutes from my home.  I did not know what to expect, I had thoughts about what these women may have gone through.  Honestly, I had prepared myself for the worst but it was nothing how I had imagined.  These women were jovial, optimistic, fun and want to make their own way!  There is no sign of pity, rather the complete opposite that room was full of hope!

I thought the group the basic techniques to make a simple pair of earrings…but three pairs later we were swapping stories, giggling and talking about the gifts God gives us.  At the end of the night the women asked me to come back, next time showing them how to make bracelets or necklaces.   We had a great time.  However, the greatest part of the night for me was sharing how important each woman is to God, His plan for their life and the gifts He has placed inside them.

The Reverend Dr. King  asked an important question, “What are you doing for others?”  I ask you that same question as well. What are you doing to make someone’s life better?  Many times we think that means giving money, clothes, cars or the alike.  But giving of our time one of the most valuable assets can serve as a greater gift. So if you are a crafter why not take some time out of designing and share your gift with the world, you’ll be better for it.

Here are some pictures from this week’s craft time with the women.  Special shout-out to Arts and Crafts store Michaels of Sumter, SC for donating the supplies.  It is so awesome to have corporate businesses that are also community partners. THANK YOU Michaels!

The supplies from Michaels


Ms. Toni(r) employee at the shelter and "Den Mother" of the group


The Finished Product Part 1

Finished Product Part 2

Finished Product Part 3

In His Super Grace

Ro:)
 

Freestyle Friday: Hair it is…

27 Jan

Time to get crafty! Here at SuperMOMdel world headquarters we are always trying out new things and even looking at things already done to see how we can make it.  They say imitation is the sincerest form of flattery. Well, all the rage now are hair accessories. I love it. I cut my hair short last year and really enjoy hair pins and head bands.  Most, recently someone very dear to me went au naturel .  I wanted to make her something real nice to celebrate her transition from relaxed hair.

Here is what you need. I found at Michaels these hair pins that had a hallow center where I could add my design. I picked up two different kinds of scrapbook paper so she would have variety, I also put some gemstones, although I never used them, scissors, a pencil and my new favorite thing: Mod Podge Dimensional Magic.

Next, take a plain piece of paper, take the well of the hair clip, trace the center, then cut it out as a model.

Now, pick out your scrapbook paper. I always pick up extra from Michaels when the paper is 5 for 1 buck.  I also had some computer paper that had a really cute border. I took my oval and traced it on the part of the paper which had the most color.

Then it was time for the glue! I used super glue, just a dab with do. You don’t want to use too much that caused the glue to seep through the paper. Another option you can affix the paper to a small piece of cardboard and attach to the inside of the hair clip.

I love shiny things! My dear friend not so much. but I figured just a lil’ bling (flat back crystal stones by Jolee).  When using Dimensional Magic it is VERY important you make sure to have your item on a level surface. I used some sticky notes, clever right?  Here are some other things to keep in mind as well. Make sure NOT to shake the bottle. You do not want air bubbles in your finished product because it will dry that way.  If you find some air bubbles anyway, make sure to pop them. Also, make sure to have the correct room temperature to prevent cracks. 

And finally, my favorite part add Mod Podge Dimensional Magic. Plaid the company which makes this neat product says Dimensional Magic creates faux mosaic, quilt and other textures with added dimension.  It takes about 24 hours to dry.  Once dried take a damp cloth, wipe off project to give a clear shine! My friend Amy from Mod Podge Rocks recommends if after drying you see dips in your project it is okay to add more Dimensional Magic to the area.

There you have it. Will you try it? 

By the way, when I gave my dear friend her new hair pins… she was happy and told me she has to hide them from her daughter.

In His Super Grace

Ro:)


Freestyle Friday: The Princess Room

20 Jan

Every Friday(fingers crossed) I plan to post creative craft ideas done in a weekend.  Today’s post is one I am very excited and yes, Mama proud of.  For Christmas my 5 and 4-year-olds got their own room.  They affectionately call it the “Princess room.” You will see why in a moment.  At first, I had planned on doing a garden themed room however my 5-year-old changed my mind.  My husband and I are making it a priority to teach our girls they are “princesses” in the Lord’s royal court.  We want them to know just how special they are to God, us and the world.  We believe when we do this they will never compromise because they know who they are.  Thus, this is what led us do doing a “Princess” themed room.  My 5-year-old and I were talking one night. I asked her who she was. i was expecting for her to say her name, but instead she said “I am a princess.” I was on a major budget(as usual) with this project.  But with Christ as Lord over my shopping we pulled off a great room makeover, the girls love and happily show off to visitors to our home. Here are a few of my favorite things about this project:

Paint It: I painted the room in a peachy pink and mint green color.  I am so happy about the peachy paint stowed away at my parents home in my Dad’s workshop.  The mint green paint, used in the background of the built-in shelves cost just $3 bucks! Hallelujah! Tip: When shopping for paint check the paint clearance section at your local hardware/home improvement store.

Masterpieces on Display:  I purchased these wood blocks from Michaels  and covered them in princess themed scrapbook paper with a clothespins attached, so the girls can hang up artwork. I got the idea from Little Miss Momma’s Blog. This is so easy and super cheap to do!

 Ballerina Princess:  Every little girl wants to be a ballerina, right? I scored this from Hobby Lobby for less than $6. It has a crack in it and talked the manager into giving me an extra discount.  It may not completely match the colors of the room but nonetheless it adds a little pop to the decor.

Yes, You can write on the wall: I am so into chalkboard paint. I blame Pinterest! I have seen so many cool chalkboard projects. I purchased a can of chalkboard paint from Lowe’s for about $13. I did not want to do the classic square but several different shapes. I think we will add more.

Switching things Up!: I decorated all the visible outlet covers with “princess” themed scrapbook paper. I had a good bit left over from the previous project. I posted step by step instructions here.

On Display: Overall what I love about this room are the shelves which can with the house when we purchased.

And finally at the built-in desk around the trim I placed these wall decal Princesses. Mt daughters were so delighted about this find from the dollar tree, yes I said the dollar tree!

So what do you think? Did I do a good job?

In His Super Grace

Ro:)

Time for Some AUCTION

12 Jan

There is not much these days that doesn’t make me excited! I am so pumped about 2012. One of the things I am super excited about is my upcoming auction.  Besides being a wife, mama, blogger and everything else in between, I am also a jewelry designer.  I have made jewelry for years, starting To BEad Continued officially in 2006.  However, it was not really until last year I really started to run it like a business versus a hobby.  We specialize in designing jewelry in limited quantities so you can brag to your friends about your one of a kind find. 

This Friday night we are doing something really special and I promise you don’t want to miss this! We are having a live auction on our Facebook page.  This is our second time doing such an auction.  This first one was so much fun we decided to do it again and this time share the love with other small business owners.  Here is a rundown of the other businesses involved in the auction.

Saturday HanDBags: Features handmade totes, bags, coupon binders, organizers and more.  Jetahri De Belen, owner/designer has sewed since she was 14 years-old.  Why Saturday HanDBags?  Jetahri says she feels like Saturday is the best day out of the entire week! I would agree.

The Accessorized Woman: Features women’s scarves, fabric handbags and jewelry.  Tameka P. Marsh, owner/operator started T.A.W. out of her love for great finds at reasonable prices.  Check out The Accessorized Woman on Facebook.

So here’s the skinny on the auction.  If you want to take part of the action on Friday night, first we are asking you to do a few things.  Please go “Like” these shops Facebook page if you have not already done so. Leave the following comment on their page: new fan from@tobeadcontinued.  When you do please go to my Facebook page, To BEad Continued and leave a comment letting me know you have “Liked” both pages.  Of course, this is an honor system however, the shop owners would really appreciate the Facebook love!  Now you are ready to shop ’til you drop!

The auction begins Friday, January 13th at 8pm and ends Saturday, January 14th at 8pm on To BEad Continued’s Fan page on Facebook.  All items are in a photo album with specific instructions on bidding. It is a win-win! So get your game face on and get ready to have a good time.  Please share with friends as we really want to support these local small business women.

In His Super Grace,

Ro 🙂

Revamped Light Switch Cover

16 Dec

There are a few things in life I really enjoy: a good book, laughs, time with family, unexpected mail and a completed to-do-list. But there is one thing you can add to that list: Mod Podge.  To me its liquid, creamy goodness. I try to find ways to use they stuff. For those who never heard of Mod Podge, shame on you! Just kidding. But here is a quick definition per the makers of Mod Podge, Plaid Enterprises.

Mod Podge is an acid-free brand of glue produced by Plaid.  The company describes it as “the original all-in-one glue, sealer and finish.” It can be used to both glue something down and as a protective layer over it, instead of a varnish. Mod Podge comes in a gloss, satin, or matte finish.   The name was derived by its creator, Jan Wetstone, from the terms “modern decoupage”.

Genius, I know!  Well, as a big present for our girls we are giving them a princess themed bedroom.  We painted the room pink, of course and there are lots of frills and girlie things.  When I was painting I did not use painters tape to make off the wall switches, honestly, I never do, don’t judge me. lol. Instead of buying new light covers to fit our “royal court” I decided to be creative.  Here is a look at what I did.

 The ever so sad light switch. Look at it folks just begging for a facelift.

 These are the materials we will use, all can be purchased at any local craft store. (Mod Podge Gloss, Mod Podge roller(can usually find in a kit), Tacky Glue, Foam brush, a pair of Scissors)    

 First, look at your scrapbook paper in comparison to the holes in the switch cover.  For example, I was going to use the section “my prince” but when I cut out the middle for the sockets half the words would be missing.  I chose one where I could still make out the words, this of course is not a concern when you are using scrapbook paper without words.


From "tacky" to "classy"

 You want to take your Tacky glue, which you can find at any local craft store and put a fair amount, not too much but a liberal amount on the light switch panel itself.  You then will take your foam brush and spread it out evenly.


 Start layering the scrapbook paper on top of the glue.  Again, because I am using scrapbook paper with words, I was able to cut my paper in sections.  Add however much paper you think you may need to cover the entire switch plate.


Mod Podge has this roller “thingy” which I enjoy using.  This helps smooth out the rough patches, making sure the paper is flat to the surface. I think it is worth the investment!


I folded my paper over in order to trim off the excess.


 Again, I am just layering the paper, lining it up, making sure the area is completely covered even down to the edges.


My favorite part: Mod Podge. Take a foam brush and generously sweep back and forth on the scrapbook paper. Do not soak it down with the glue but give it a liberal amount. Cover every area where you have scrapbook paper. This will further bind and harden the paper.


The Mod Podge acts like a glue, also giving it a shine! Let it drive for at least 10-15 minutes.  Make sure it is not wet anywhere before moving on to the next step.


 Once dry, take an ecko knife and cut out the holes where the outlets would go. I also punched a slight hole in the middle for the screw.


In the words of Salt and Pepper… “Push it!” Take your thumb and push out the middle. It should fall right out. Side note: I was actually thinking what could I could I make with the cutouts. I know, right? And then I said, ” Ro, just throw them away.”


Bam! Even the sockets are happy! No more boring light switch plates anymore…a dream come true…and they lived happily ever after!


In His Super Grace
Ro:)